
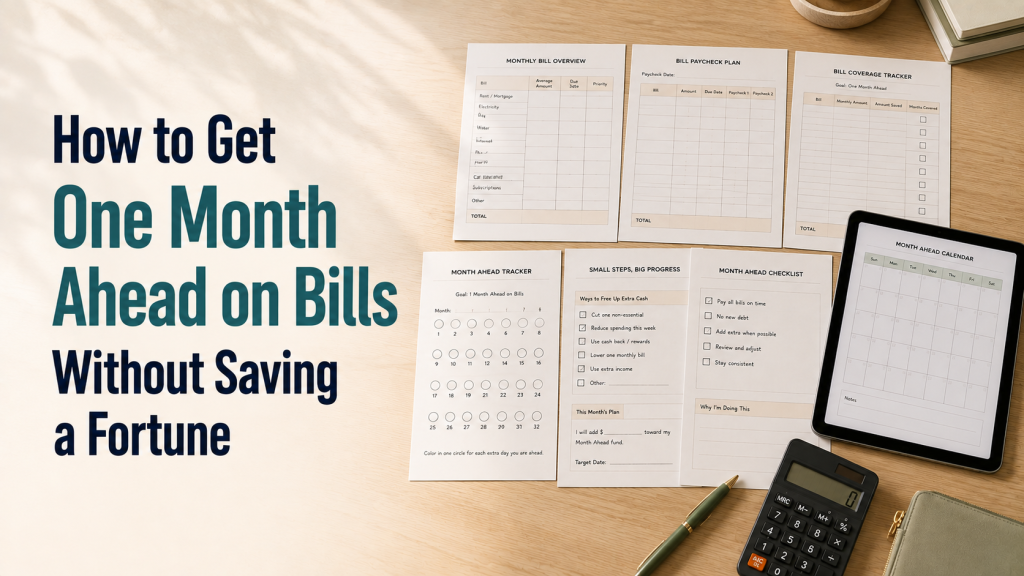
How to Get One Month Ahead on Bills Without Saving a Fortune
Learning how to get one month ahead on bills can make budgeting easier because money earned this month begins paying for expenses that are due next month.
Instead of waiting for each paycheck and immediately using it for the next bill, you gradually build a buffer between your income and your expenses.
The goal is not to save an entire month of income overnight.
You can start with one bill, one week of expenses, or even $25 from each paycheck and slowly build the amount needed to enter the next month with money already reserved.
Use the Paycheck Budget Planner Printable to assign part of each paycheck to current expenses and part to your next-month buffer.
What Does It Mean to Be One Month Ahead on Bills?
Being one month ahead means money for next month’s expenses is available before the new month begins.
For example, instead of using your August income to pay August bills as they arrive, the long-term goal is:
- August income funds September expenses
- September income funds October expenses
- October income funds November expenses
You create distance between the day money arrives and the day it must be spent.
That can make budgeting less stressful because a late paycheck or unusually expensive week does not immediately affect an upcoming bill.
Do You Need an Entire Month of Income Saved?
Not necessarily.
Suppose your take-home income is:
$3,200 per month
but your normal expenses are:
$2,850
You do not necessarily need $3,200 to be one month ahead.
The amount you actually need may be closer to the expenses that must be funded.
These might include:
- Housing
- Utilities
- Groceries
- Transportation
- Insurance
- Minimum debt payments
- Phone and internet
- Household expenses
- Necessary healthcare
A useful first target is the amount required to fund your normal month.
A Realistic One-Month-Ahead Example
Imagine your monthly expenses are:
- Rent: $1,000
- Utilities: $220
- Groceries: $450
- Transportation: $220
- Insurance: $140
- Phone and internet: $110
- Minimum debt payments: $180
- Household expenses: $80
- Personal spending: $100
- Buffer: $100
Total:
$2,600
Your long-term one-month-ahead target could therefore be:
$2,600
But you do not need to find $2,600 immediately.
Suppose you can save:
$200 per month
Time needed:
$2,600 ÷ $200 = 13 months
After three months, you already have:
$600
That may be enough to fund several upcoming bills before the new month begins.
Progress starts helping before the full goal is reached.
Start With a Smaller Goal
A complete one-month buffer may feel too large.
Break it into stages.
Stage 1 — $250 buffer
Useful for:
- Utility bills
- Groceries
- Fuel
- Small unexpected differences
Stage 2 — $500 buffer
Can cover several bills or part of a paycheck period.
Stage 3 — One week of expenses
Suppose monthly essentials are:
$2,400
Approximate weekly amount:
$2,400 ÷ 4 = $600
Stage 4 — Half a month
Target:
$1,200
Stage 5 — Full month
Target:
$2,400
Smaller milestones make the goal easier to maintain.
How to Get One Month Ahead on Bills
Step 1: Calculate Your Real Monthly Expenses
Start with what you actually spend.
List:
- Rent or mortgage
- Electricity
- Gas
- Water
- Groceries
- Transportation
- Insurance
- Phone
- Internet
- Minimum debt payments
- Medication
- Household expenses
- Necessary childcare
- Personal spending
- Savings
- Buffer
Use the Expense Tracker Printable PDF if you are not sure how much you really spend.
Do not create the buffer goal using an unrealistically low budget.
Step 2: Separate Essential Expenses From Optional Spending
Your first one-month-ahead goal does not need to cover every optional expense.
Start with essentials.
For example:
Essential monthly expenses
- Rent: $1,000
- Utilities: $220
- Groceries: $450
- Transportation: $220
- Insurance: $140
- Phone and internet: $110
- Minimum debt payments: $180
Total:
$2,320
Optional categories might include:
- Entertainment
- Shopping
- Takeout
- Hobbies
- Extra debt payments
Your first buffer goal could therefore be closer to:
$2,320
rather than your entire normal monthly spending amount.
Step 3: Choose Your First Buffer Milestone
Do not begin with:
Goal: $2,320if that number feels impossible.
Start with:
Goal 1: $250Then:
Goal 2: $500Then:
Goal 3: $1,000Each milestone creates more distance between income and upcoming expenses.
Step 4: Decide How Much Each Paycheck Can Contribute
Suppose you receive two paychecks per month.
Take-home pay:
$1,600 per paycheck
After current expenses, you can safely save:
$75 from each paycheck
Monthly contribution:
$75 × 2 = $150
Annual contribution:
$150 × 12 = $1,800
That is enough to build a meaningful buffer without requiring a large one-time deposit.
Use the Paycheck Budget Planner Printable to reserve the contribution immediately after payday.
Step 5: Pay Current Bills First
Do not create a future-month buffer while allowing important current bills to become overdue.
The order should be:
- Current housing
- Essential utilities
- Groceries
- Work transportation
- Necessary healthcare
- Required insurance
- Minimum required debt payments
- Current essential bills
- Small emergency buffer
- One-month-ahead contribution
If you are already behind, first use the plan in How to Catch Up on Bills When You Are Behind.
Getting ahead works best after the current month is stable.
Step 6: Build One Bill Ahead First
You do not need to fund the entire next month at once.
Choose one bill.
For example:
Electricity budget: $150Save $50 for three months:
$50 × 3 = $150
Now the next electricity bill is already funded.
Then move to another expense.
Possible order:
- Electricity
- Phone
- Insurance
- Groceries
- Transportation
- Rent
Each funded category reduces pressure on future paychecks.
Step 7: Fund Groceries One Week Ahead
Groceries are another useful early milestone.
Suppose your weekly grocery budget is:
$125
Save an additional:
$25 per week
After five weeks:
$25 × 5 = $125
You now have one full week of grocery money available before the week begins.
Later, increase this to two weeks.
Use the Weekly Budget Planner Printable to keep current grocery spending separate from future grocery reserves.
Step 8: Protect the Buffer From Everyday Spending
The biggest danger is treating saved buffer money as available cash.
Suppose your checking account shows:
$1,850
but that includes:
- Next month electricity: $150
- Next month phone: $90
- Future groceries: $250
- Insurance reserve: $140
Reserved amount:
$630
Money that is not already assigned:
$1,850 − $630 = $1,220
The full bank balance is not available for spending.
Keep the buffer organized using:
- Separate savings space
- Digital categories
- Separate checking account
- Written budget categories
- Cash envelopes
Step 9: Use Extra Paychecks Carefully
People paid weekly or biweekly occasionally receive an additional paycheck during a calendar month.
That can accelerate the one-month-ahead goal.
Suppose your normal biweekly paycheck is:
$1,500
A three-paycheck month does not mean the full third paycheck is free.
First cover:
- Expenses until the next payday
- Groceries
- Transportation
- Bills
- Existing commitments
Then consider putting part of the remaining amount toward the buffer.
For example:
- Extra paycheck: $1,500
- Normal expenses funded by it: $650
- Remaining: $850
You might assign:
- One-month-ahead buffer: $500
- Emergency savings: $150
- Sinking funds: $100
- Personal spending: $100
That single month can move the goal forward significantly.
Step 10: Use Money Left at the End of a Pay Period
Suppose you planned:
$400
for two weeks of flexible spending.
Actual spending:
$355
Money remaining:
$45
Instead of automatically spending it, move:
$45
into the next-month buffer.
If you do this twice per month:
$45 × 2 = $90
Over one year:
$90 × 12 = $1,080
Small leftovers matter.
Step 11: Redirect Money After Paying Off a Bill or Debt
Suppose you finish paying a small loan with a monthly payment of:
$85
Instead of adding the $85 to general spending, redirect it into the buffer.
Monthly:
$85
Annual:
$85 × 12 = $1,020
Once the buffer is complete, that money can support:
- Emergency savings
- Debt payoff
- Investing
- Sinking funds
- Other goals
Step 12: Keep Emergency Savings Separate
A one-month-ahead buffer is not exactly the same as an emergency fund.
One-month-ahead buffer
Purpose:
Pay normal future expenses earlier.
Emergency fund
Purpose:
Cover unexpected financial emergencies.
For example:
- Next month rent → one-month buffer
- Next month groceries → one-month buffer
- Unexpected car repair → emergency fund
- Sudden medical expense → emergency fund
Use the Emergency Fund Tracker Printable to keep emergency savings separate.
How to Get One Month Ahead When Paid Weekly
Suppose you receive:
$800 each week
You decide to reserve:
$25 per paycheck
Annual contribution:
$25 × 52 = $1,300
Increase it to:
$40 per week
and you create:
$40 × 52 = $2,080 per year
Weekly pay can make the process easier because you have more frequent opportunities to make small contributions.
For the full weekly budgeting system, read How to Budget When Paid Weekly.
How to Get One Month Ahead When Paid Biweekly
Suppose you receive:
$1,600 every two weeks
Set aside:
$75 per paycheck
With 26 paychecks:
$75 × 26 = $1,950 per year
During two three-paycheck months, you may be able to contribute additional money.
Read How to Split a Biweekly Paycheck to protect Week 2 money before adding future-month savings.
How to Start When Money Is Tight
If your budget has almost no room, do not force a large contribution.
Start with:
- $5 per week
- $10 per paycheck
- $20 per month
- Money left after cheaper bills
- Small subscription savings
- Part of extra income
Suppose you save:
$10 per week
Annual total:
$520
That may fund:
- Electricity
- Phone
- Insurance
- Part of groceries
A partial buffer is still useful.
For a budget focused on essential expenses first, use the Low Income Budget Planner.
Reduce One Recurring Expense
Find one cost that can be redirected.
For example:
- Unused subscription: $15
- Reduced takeout: $30
- Cheaper phone plan: $15
Potential monthly contribution:
$60
Annual:
$60 × 12 = $720
You do not need to cut everything.
One or two recurring reductions can fund part of next month.
Use Cheaper Bill Months to Build the Buffer
Suppose you budget:
$150
for electricity.
Actual bill:
$118
Difference:
$32
Move the $32 into next month instead of treating it as available spending.
If several variable bills are cheaper than expected, the leftover amounts can accelerate your progress.
Read How to Budget for Bills That Change Every Month for a system based on averages and buffers.
Create a Next-Month Category
Make the buffer visible.
Instead of one generic savings category, create:
NEXT MONTHYou can then divide it into:
- Next month rent
- Next month utilities
- Next month groceries
- Next month transportation
- Next month insurance
Seeing categories become fully funded can make the goal more motivating.
When Should You Move Into the Next Month?
Suppose your normal monthly essentials are:
$2,400
Your buffer reaches:
$1,800
You do not necessarily need to wait until $2,400 before using the system.
You could begin funding:
- Rent: $1,000
- Utilities: $250
- Insurance: $150
- Groceries: $400
Total:
$1,800
Those categories are now ahead.
Continue building the remaining categories from future income.
What Happens When You Are Fully One Month Ahead?
Suppose September expenses total:
$2,600
By August 31, you already have:
$2,600
reserved.
September income is then available to fund October.
The monthly routine becomes:
Beginning of September
Use August money to fund September.
During September
Income arrives but is assigned to October.
End of September
October is already funded.
You have created a full-month gap between earning and spending.
What Should You Do With the Buffer After It Is Complete?
Once you are fully one month ahead, stop increasing the category unless normal monthly expenses rise.
Redirect new surplus toward:
- Emergency fund
- Debt payoff
- Sinking funds
- Retirement
- Other savings goals
Review the buffer periodically to make sure it still matches your real monthly needs.
Do Not Confuse Being Ahead With Having Extra Spending Money
Suppose you have:
$3,000
in a next-month account.
That does not mean you have $3,000 available for shopping.
The money already belongs to:
- Future rent
- Future utilities
- Future groceries
- Future transportation
- Future insurance
Treat it as already spent.
One Month Ahead Versus Emergency Fund
A household may eventually want both.
For example:
Next-month buffer
$2,500
Emergency fund
$5,000
The $2,500 pays normal expenses next month.
The $5,000 remains available for genuine emergencies.
Keeping the purposes separate prevents routine spending from draining emergency savings.
One Month Ahead Versus Sinking Funds
Sinking funds prepare for specific future expenses.
Examples:
- Car maintenance
- Annual insurance
- Holidays
- School supplies
- Home repairs
The one-month buffer handles ordinary monthly expenses.
Use the Sinking Fund Tracker Printable for irregular expenses that do not belong in the normal monthly budget.
Common Mistakes When Trying to Get One Month Ahead
Trying to Save the Entire Amount Immediately
Build the buffer in stages.
Falling Behind on Current Bills
Keep current essentials stable first.
Mixing the Buffer With Spending Money
Separate it clearly.
Using Emergency Savings as the Buffer
Keep emergencies and future normal expenses separate.
Treating an Extra Paycheck as Completely Free Money
Cover the pay period first, then allocate the remainder.
Spending Leftover Budget Money
Redirect some leftovers into the next month.
Creating an Unrealistic Goal
Use real monthly expenses.
Giving Up Because Progress Is Slow
Even $250–$500 ahead can reduce financial pressure.
Download the Free Paycheck Budget Planner
The printable planner helps you:
- Record every paycheck
- List bills due before the next payday
- Reserve money for current essentials
- Protect future bill money
- Add a next-month contribution
- Track savings and debt
- Calculate money remaining
- Build a buffer gradually
Start with one small contribution from your next paycheck and give it one specific future job.
Explore more free budget templates and printable PDF trackers for weekly budgeting, bills, expenses, emergency savings, debt, and low-income planning.
Frequently Asked Questions
How much money do I need to be one month ahead?
Use your real monthly expenses rather than your income. You can start with essential expenses and build toward a complete month gradually.
Is being one month ahead the same as having an emergency fund?
No. A one-month-ahead buffer pays normal future expenses. An emergency fund is for unexpected urgent costs.
Can I start with only $10 per paycheck?
Yes. Small repeatable contributions still build a buffer and can be increased later.
Should I get current on overdue bills first?
Usually, stabilize current essential expenses and overdue accounts before aggressively building a future-month buffer.
How long does it take to get one month ahead?
Divide your target by the amount you can consistently save. The process may take several months or longer, and partial progress is still useful.